Thermal printers are invaluable for businesses relying on quick and efficient label production. However, encountering incorrect label sizes can quickly disrupt workflow and lead to wasted materials. Whether your labels are printing too small, too large, or are simply misaligned, the problem is frustrating and can impact productivity. These issues often stem from simple configuration errors rather than complex hardware malfunctions, offering a quick path to resolution.
This article presents two straightforward solutions to rectify thermal printer label size problems, guiding you through easy fixes that will get your printer back to optimal performance. For a step-by-step guide on adjusting your printer settings and correcting driver configurations, read on to quickly resolve your label size issues and eliminate frustrating printing mishaps.
Safety Guidelines
- Always turn off the thermal printer before changing any settings or replacing labels to prevent damage to the printer or injury.
- Ensure the label type selected in the printer settings (e.g., label width, label gap) precisely matches the physical label dimensions. Incorrect settings can lead to printing errors, misaligned labels, or damage to the printhead.
- If you're unsure about your printer's settings or the proper label size, consult your printer's manual or contact the manufacturer's support for assistance.
Methods: Adjust Printer Settings
Tools Needed
Step-by-Step Instructions
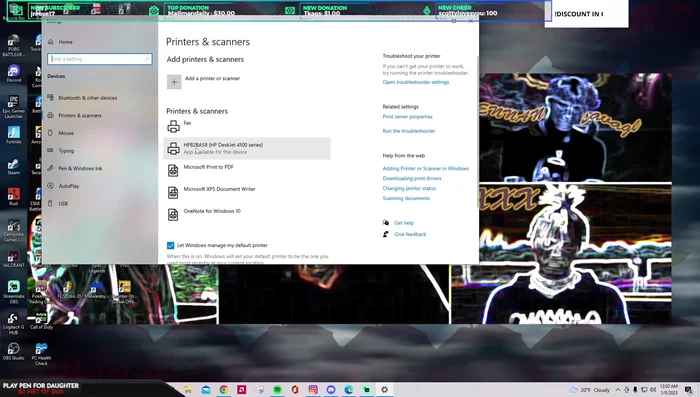
Locate Printer Settings
- Search for your printer in your settings tab.
- Select your thermal printer.

Locate Printer Settings Adjust Printer Preferences
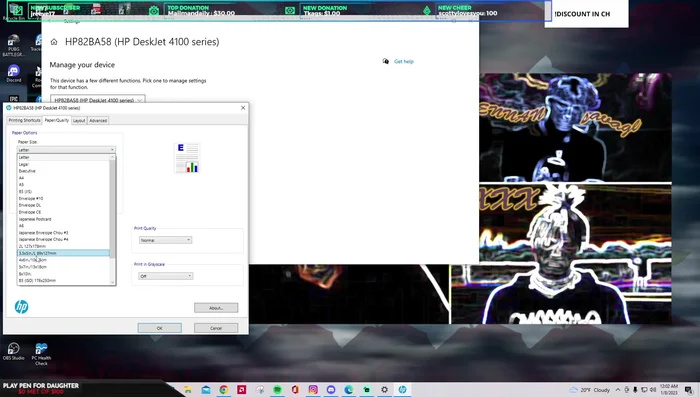
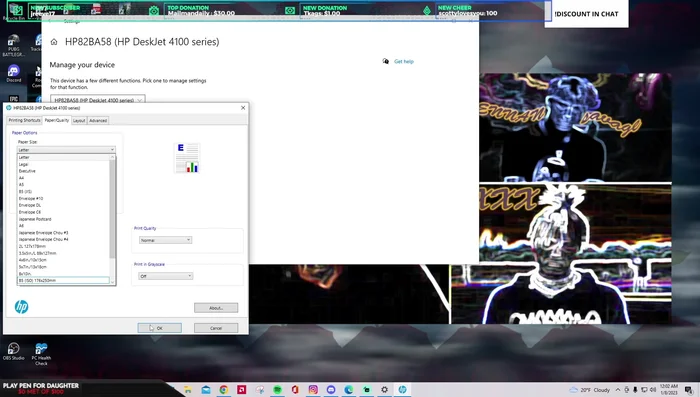
- Go to printer preferences.
- Go to layout and select portrait.
- Go to printing or paper quality.
- Set the paper size to 4x6.
Adjust Printer Preferences - Apply the changes.
Adjust Printer Preferences


Methods: Crop and Print from PDF
Tools Needed
- Computer
- PDF Reader
Step-by-Step Instructions
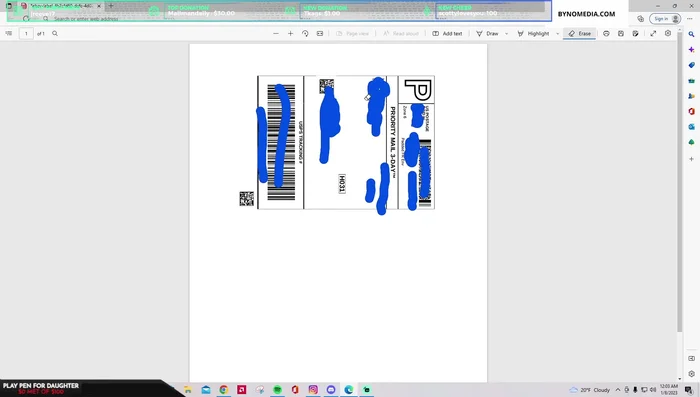
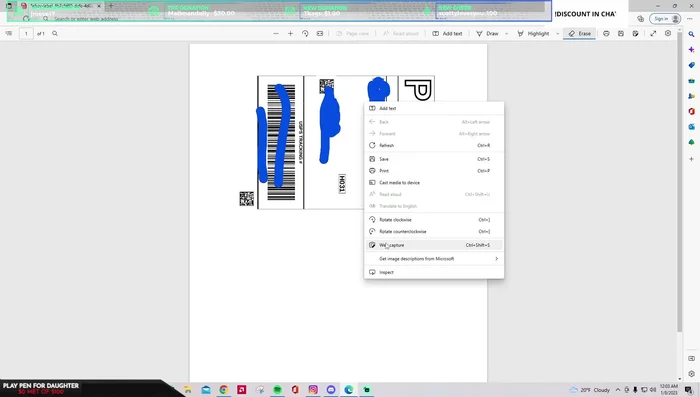
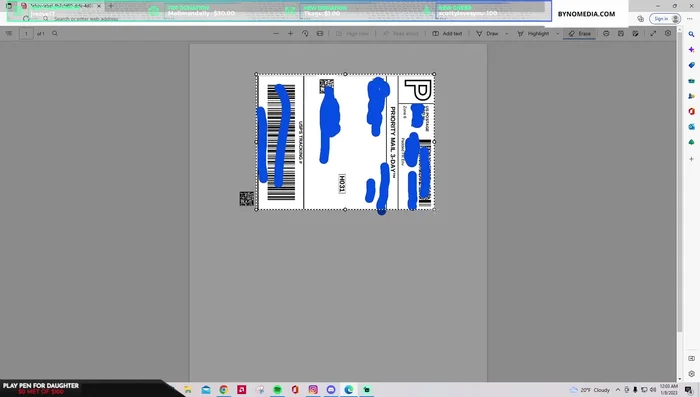
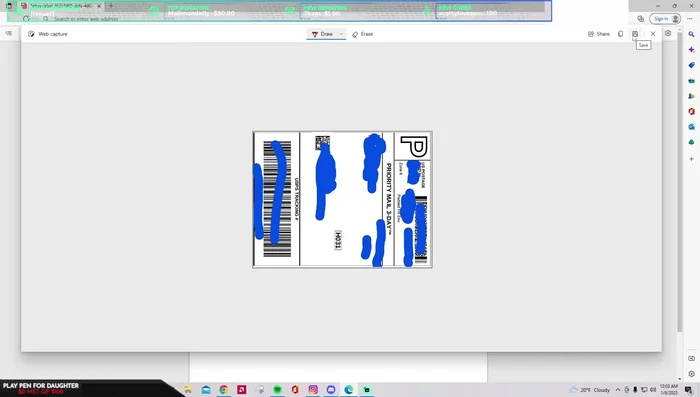
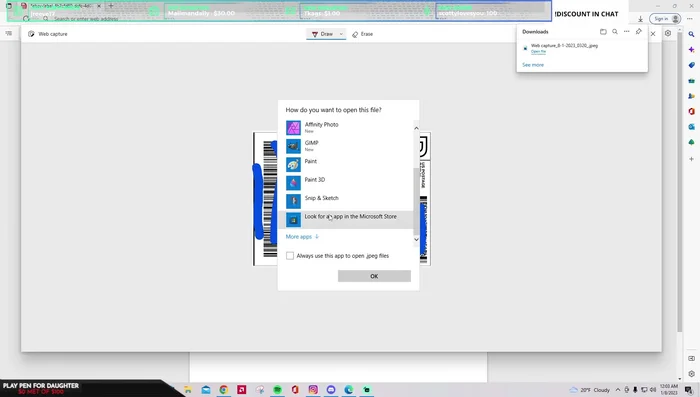
Capture and Crop Label
- Right-click on the PDF file.
- Select 'Web Capture' or similar screen capture tool.
- Crop the image to only include the desired label.
- Save the cropped image.
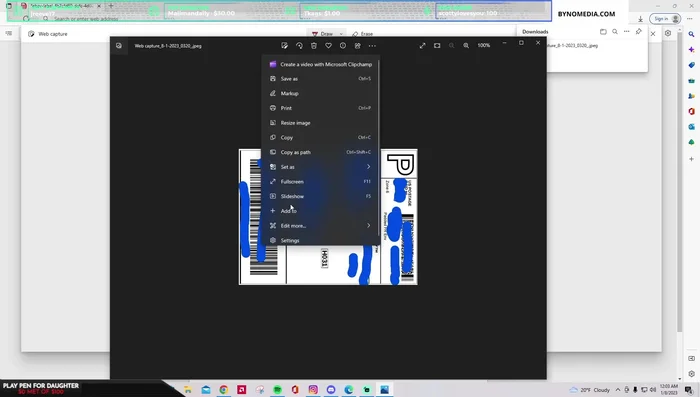
Capture and Crop Label Print Cropped Label
- Open the saved image in a photo editor (e.g., Photos).
- Select 'Print' from the three dots menu.
Print Cropped Label
Read more: Ship Packages from Home: The Ultimate Guide to Fast & Easy Shipping with Shippo