Tired of messy, disorganized thermal label rolls cluttering your workspace? This step-by-step guide shows you how to build a robust and efficient thermal label roll holder using readily available PVC pipes and fittings. This DIY project is surprisingly simple, requiring minimal tools and expertise, making it perfect for beginners. You'll learn how to assemble a custom holder tailored to your specific needs, eliminating the need for expensive pre-made solutions. Get ready to organize your labels and streamline your workflow with this cost-effective and satisfying project.This guide provides a complete walkthrough, from gathering the necessary materials to the final assembly. Clear instructions and detailed images will guide you through each step, ensuring a successful build. The resulting holder provides a secure and stable platform for your thermal label rolls, keeping them readily accessible and protected. By the end of this tutorial, you'll have a functional, durable, and custom-designed thermal label roll holder built entirely by yourself.
Read more: 5 Best White Thermal Label Holders
Materials Needed
To build this handy thermal label roll holder, you'll need a specific set of PVC pipes and fittings. The quantities and sizes are crucial for the assembly. Make sure you gather all the necessary components before you start.
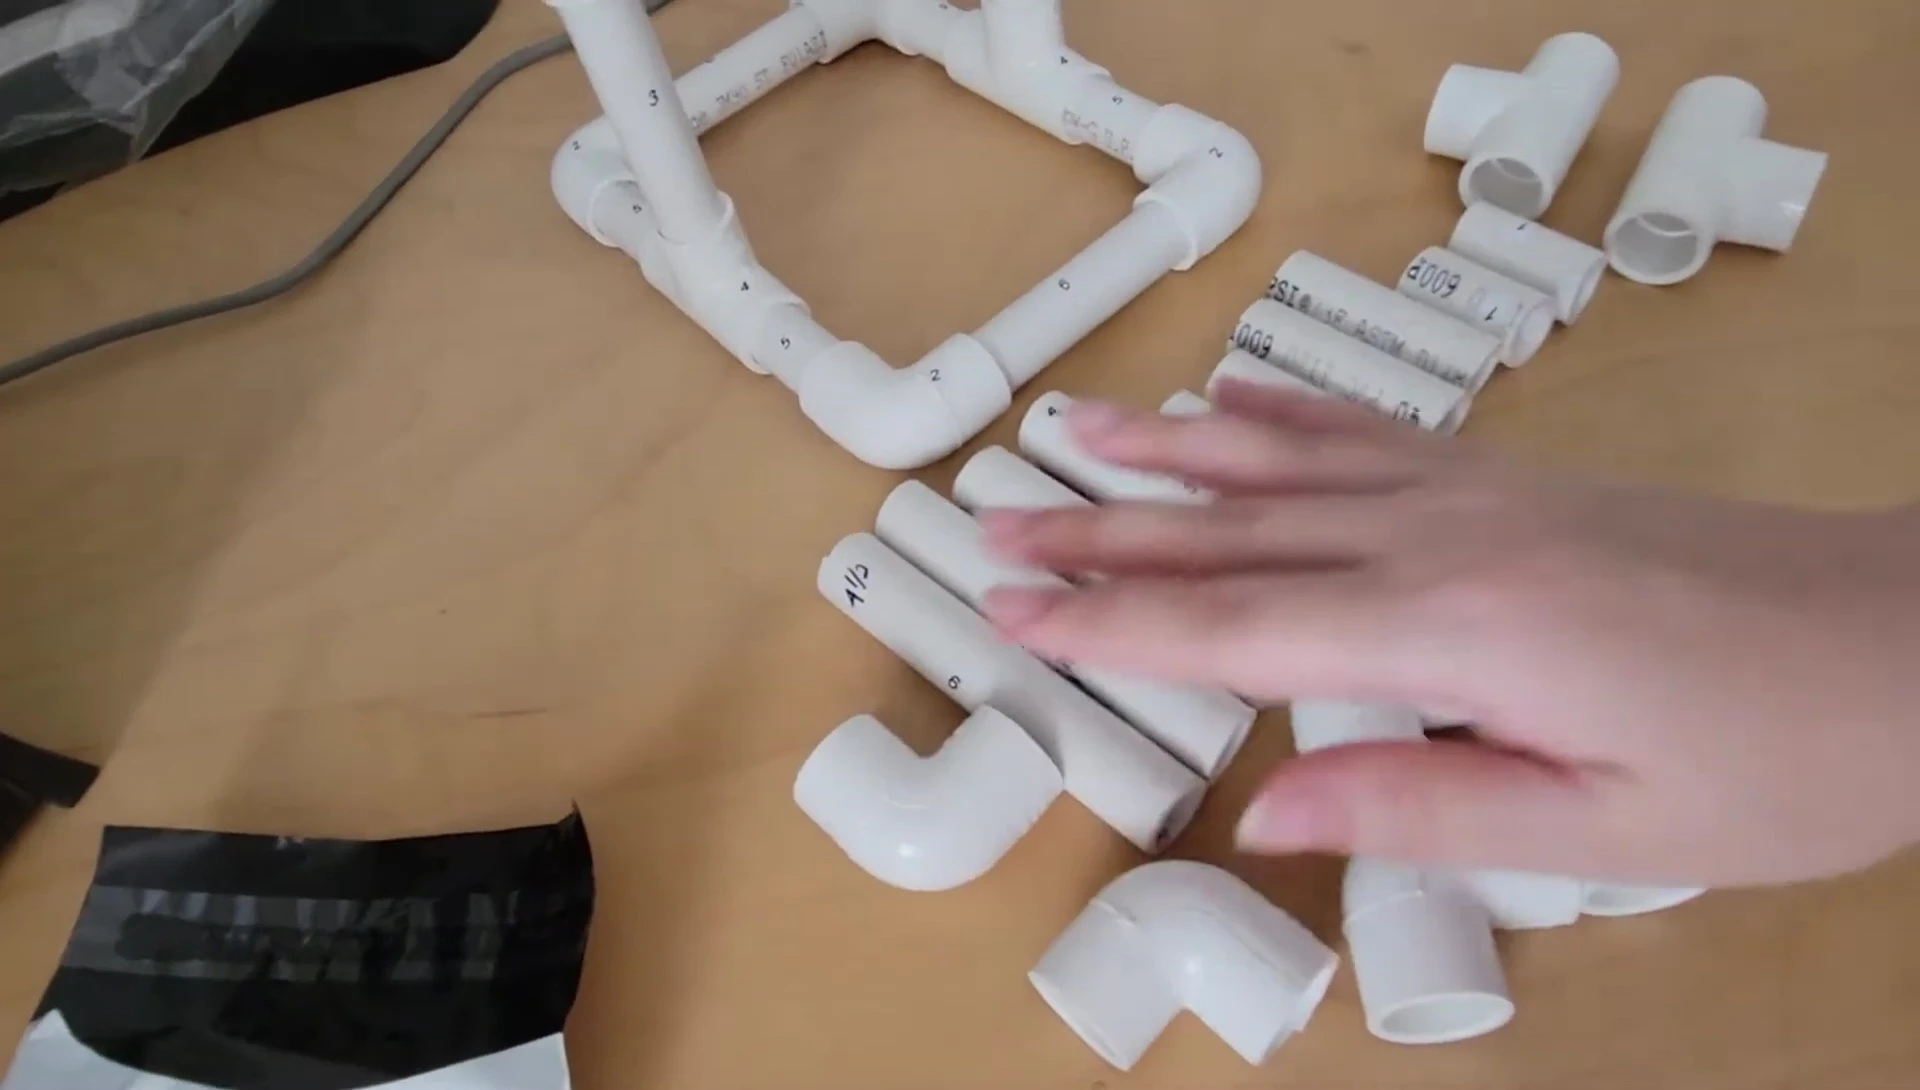
The list includes two 4-inch pieces, two 2.5-inch pieces, two 1.5-inch pieces, two 6-inch elbows, two T-fittings, and one 4.5-inch piece. Accurate measurement is essential for a proper fit and functional holder.
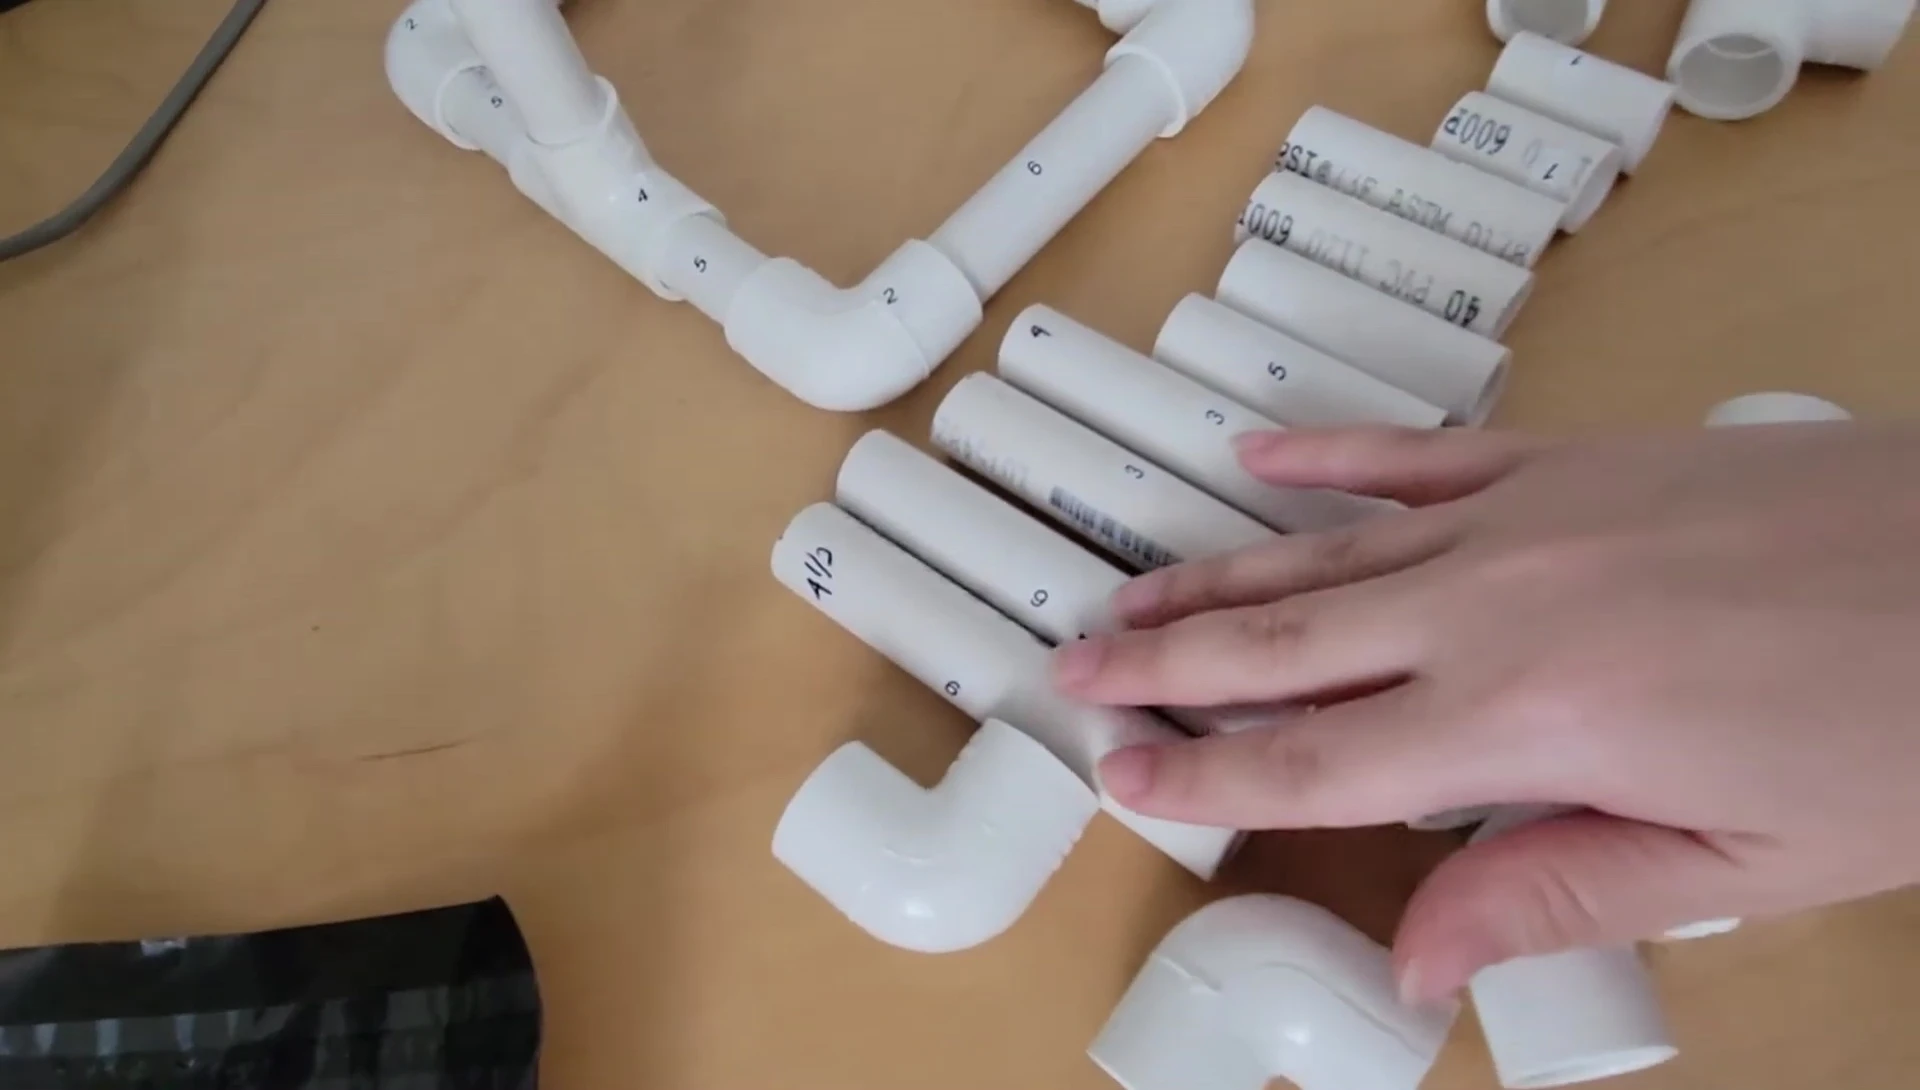
Properly labeling each piece will help you stay organized during the assembly process, avoiding confusion and ensuring the correct placement of every component.
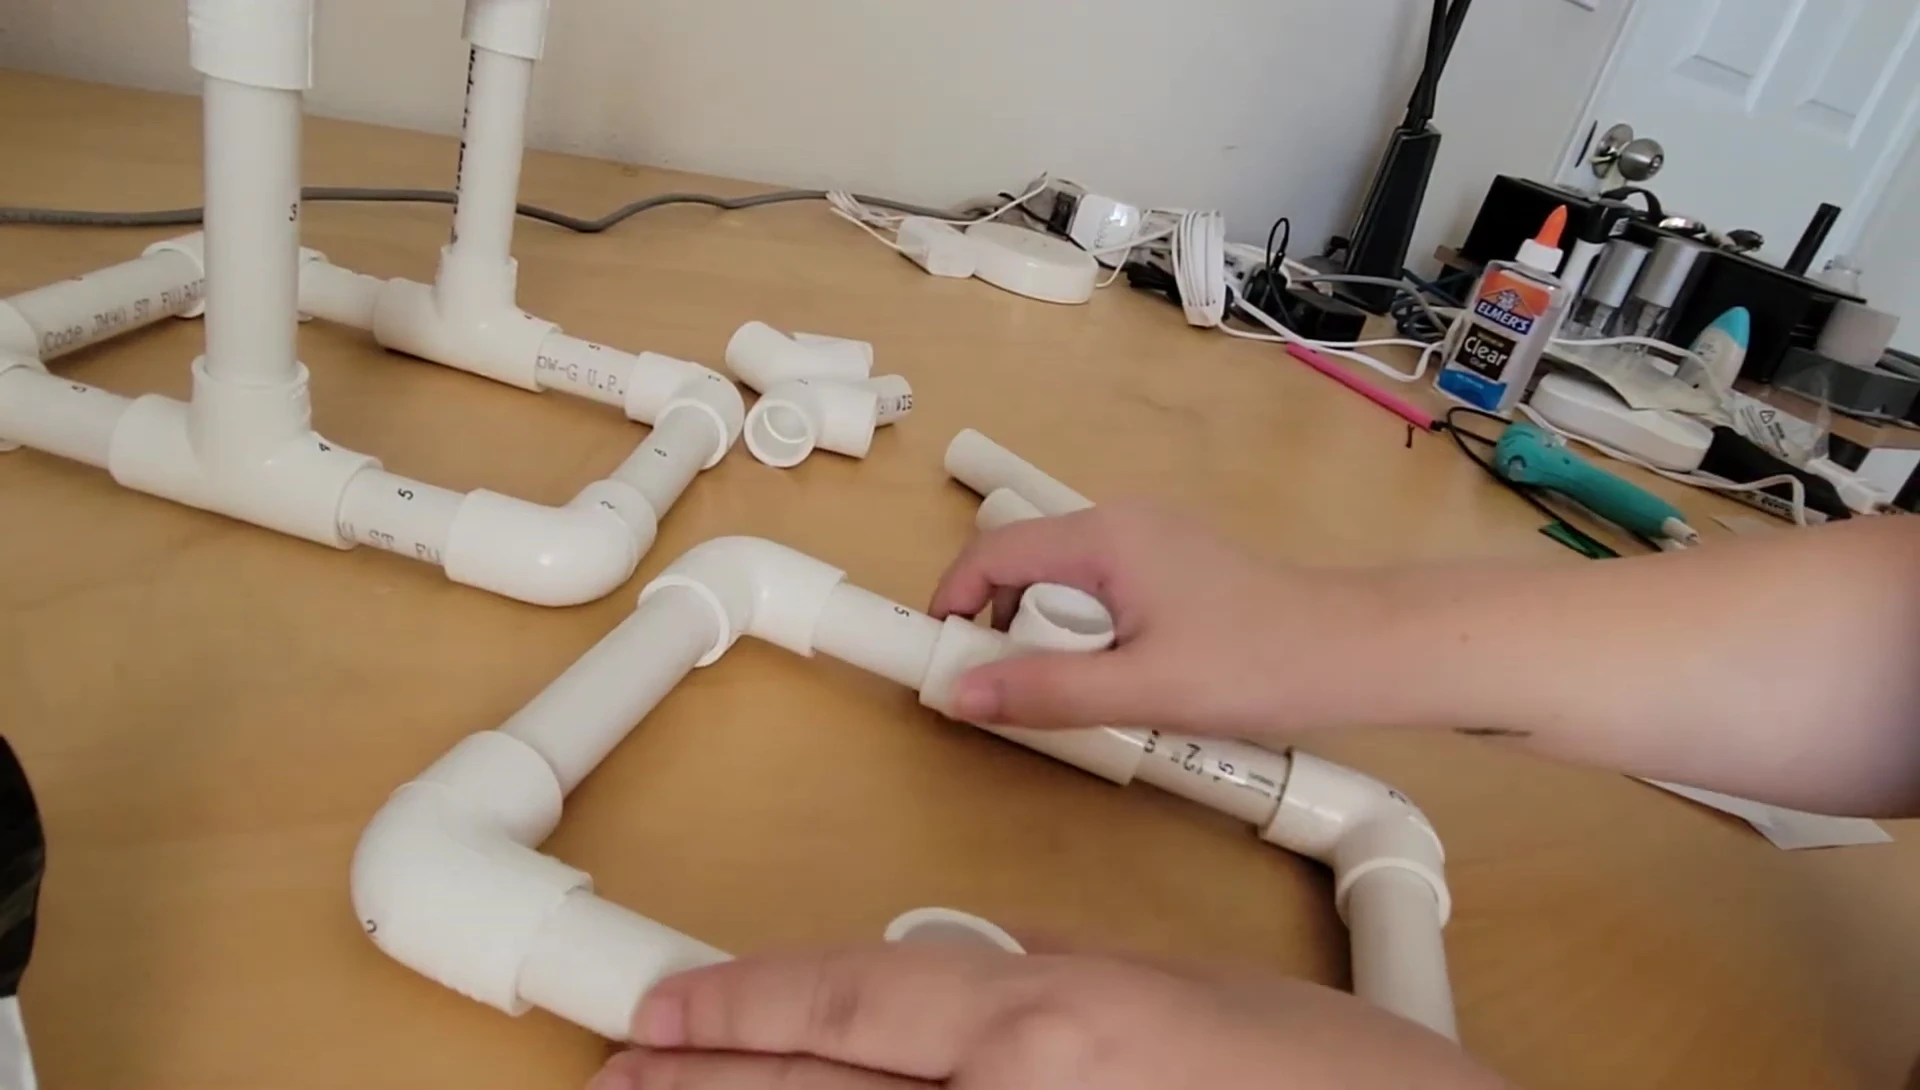
Assembling the Sides
Start by connecting two elbows (number 2) to two 4-inch pipes (number 5). Then, insert a T-fitting (number 4) in between them.
Repeat the process by adding another 4-inch pipe (number 5) and an elbow (number 2) to complete one side of the structure. This creates a symmetrical base for the roll holder.
You should end up with a straight line of PVC piping with the T-fitting in the center for each side. Carefully align the fittings to ensure a strong and secure connection.
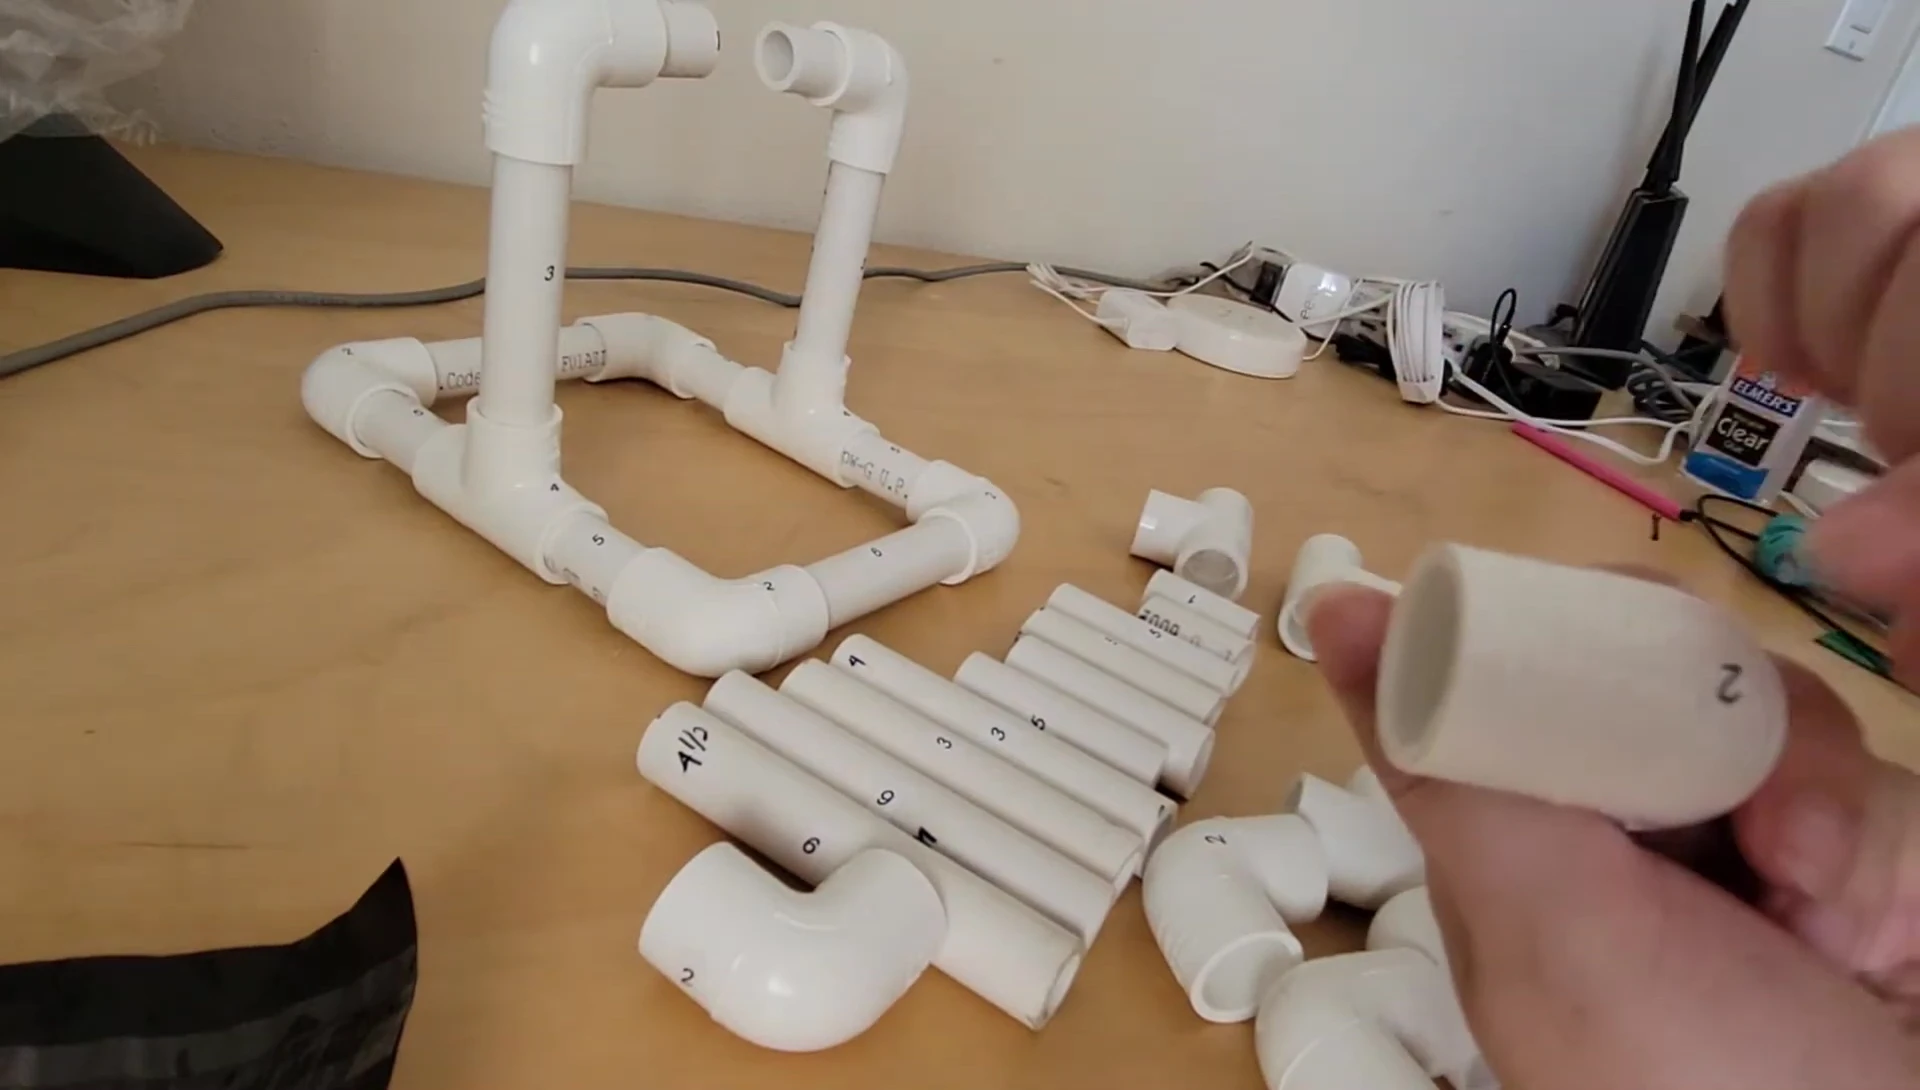
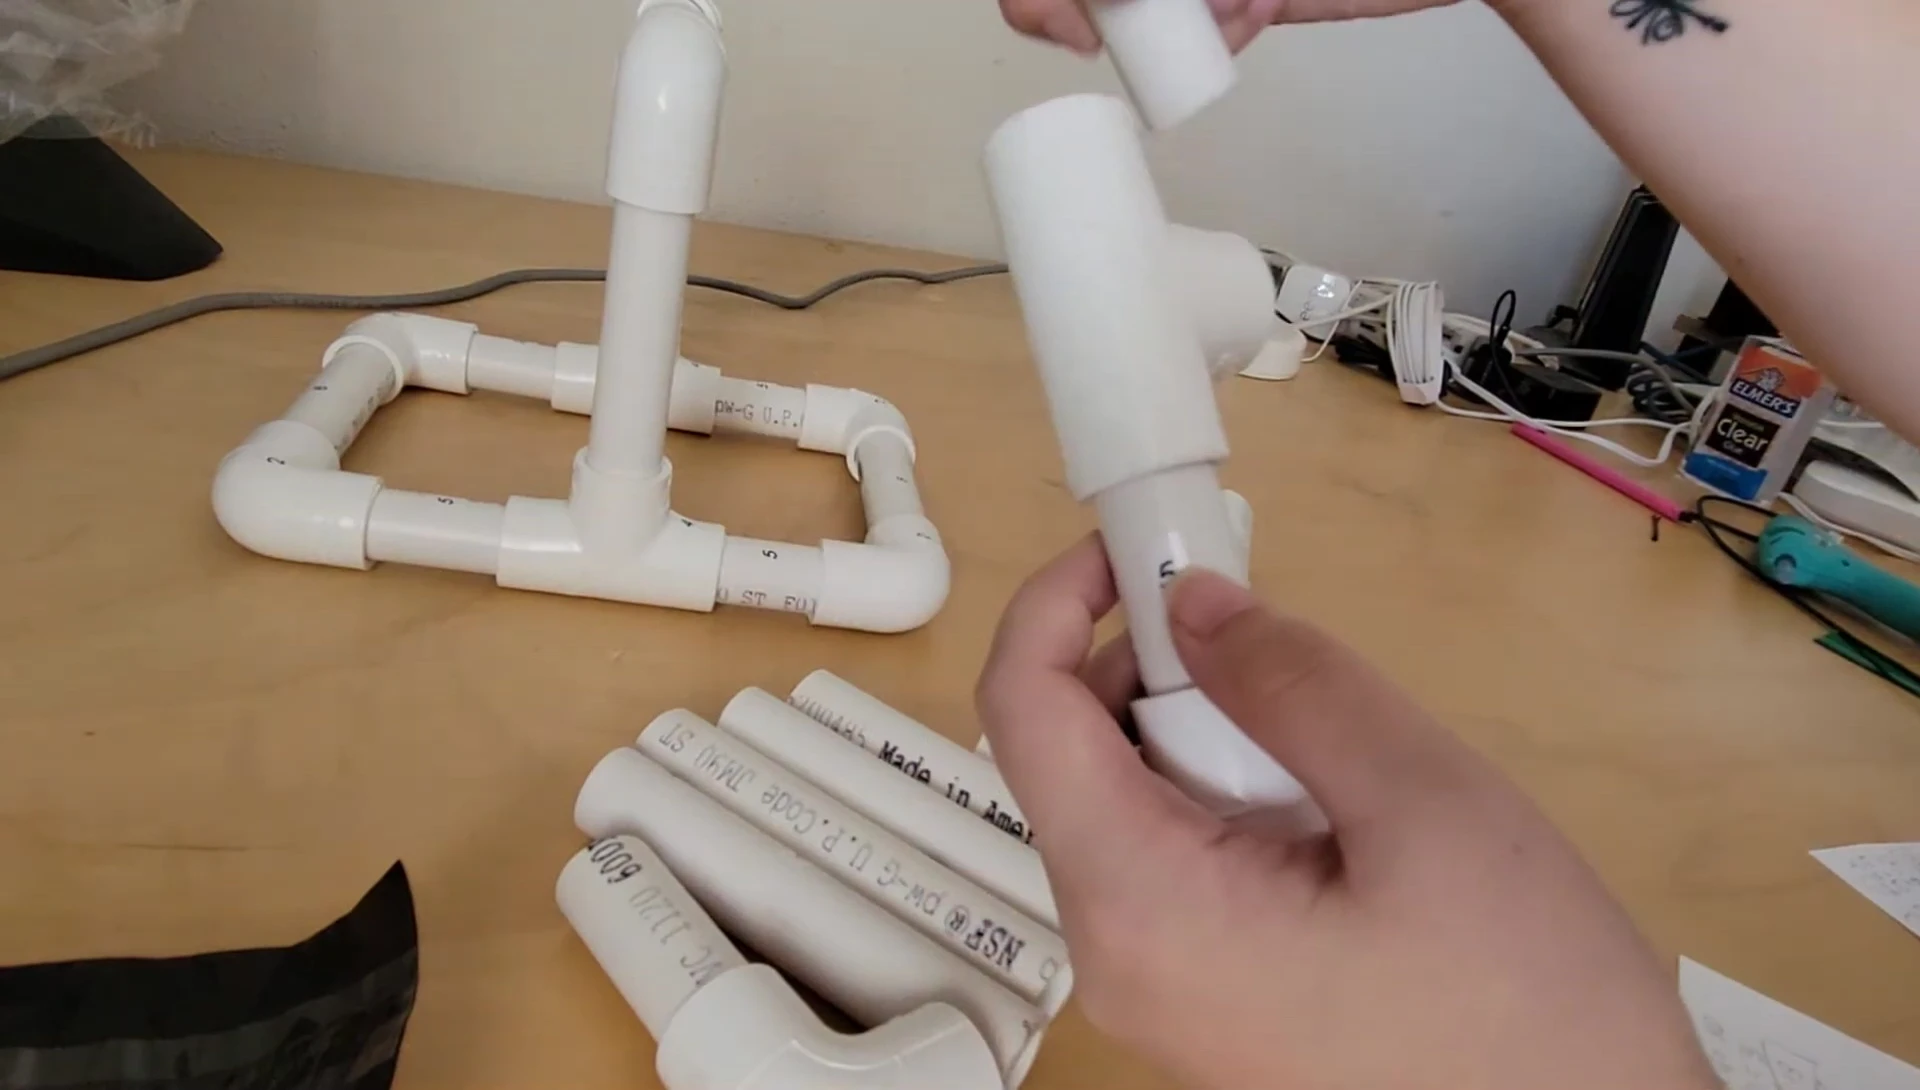
Creating the Base and Top
Once both sides are constructed, connect them using a 6-inch piece of PVC (number 6). This will form the sturdy base of your roll holder.
Attaching the shorter PVC pipes (number 3) to the top of the structure creates the support points. Next, connect the remaining elbows to the top ends of the 3-inch PVC
Finally, attach the last short piece of pipe (number 1) which will act as a retaining lip to secure the thermal roll.
Using the Roll Holder
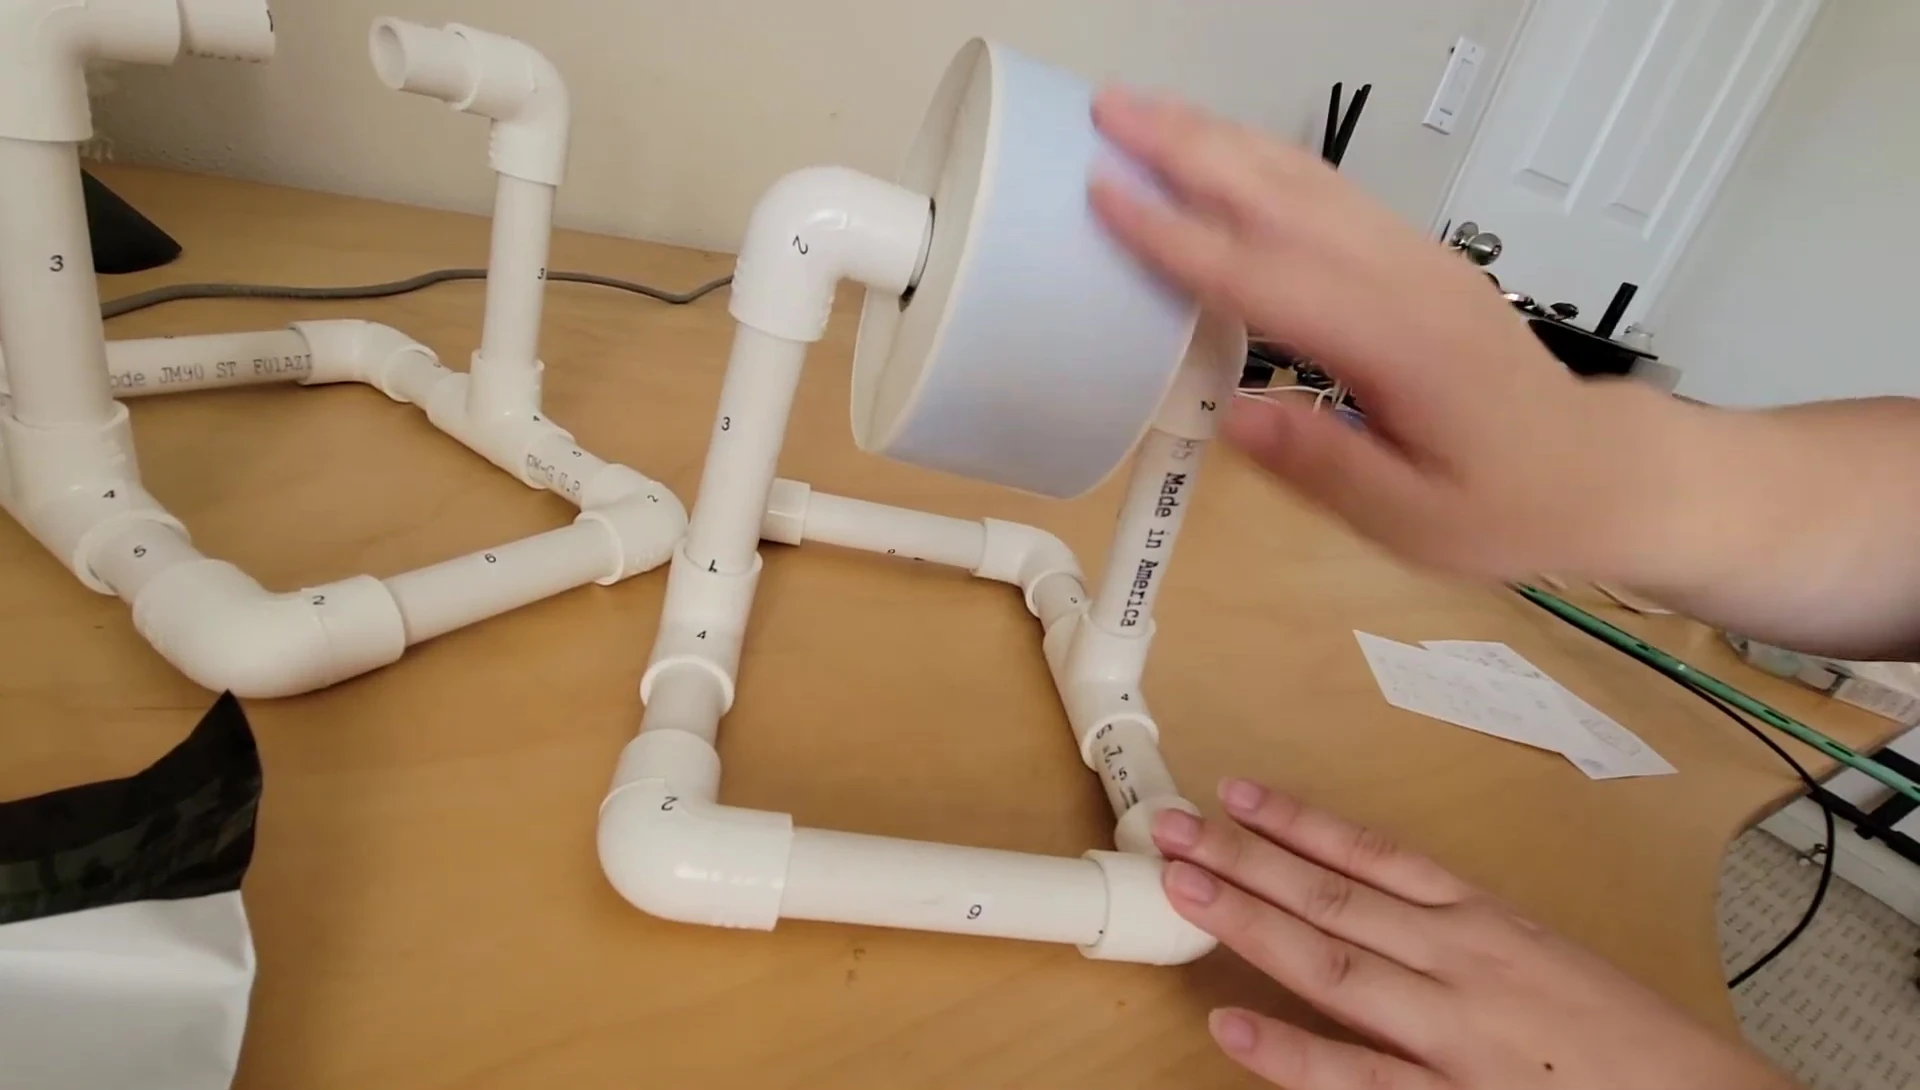
To load the thermal roll, you'll slightly open the T-fitting on top. This allows space for the roll to be placed securely.
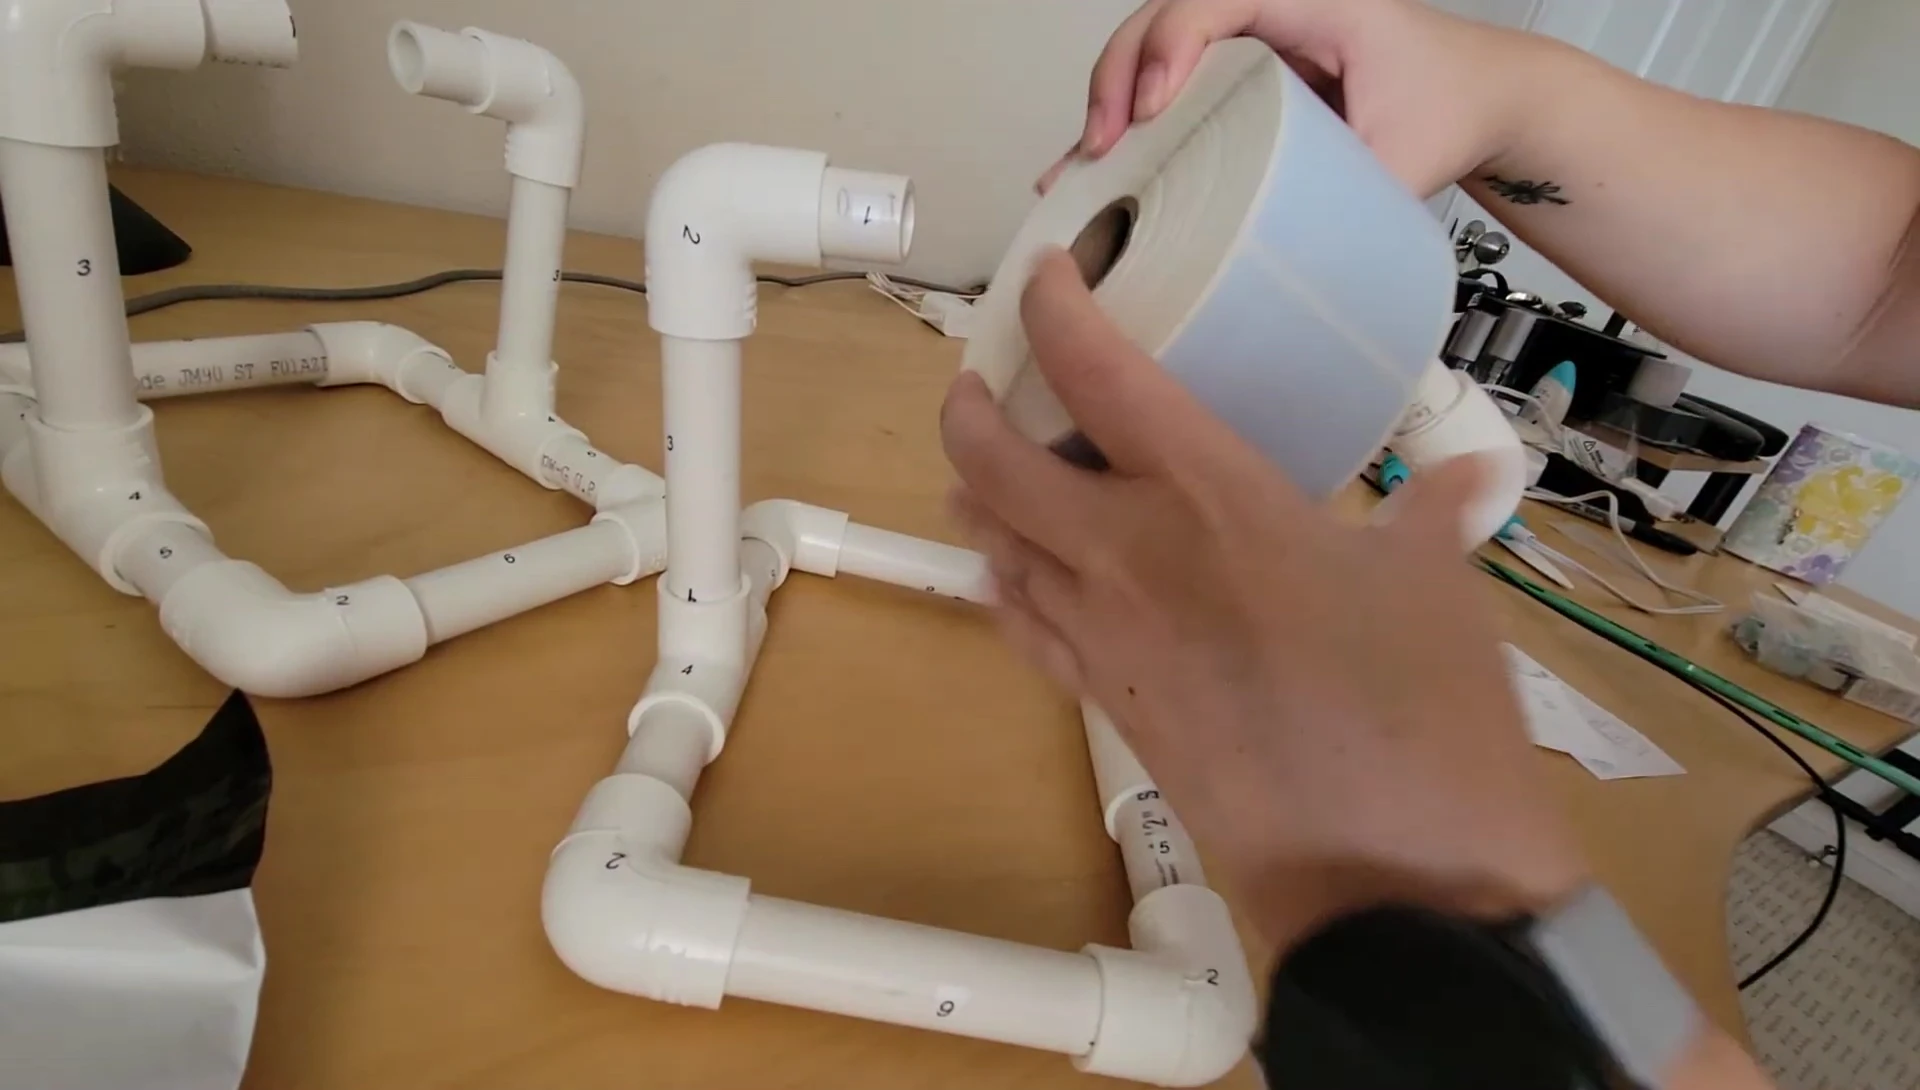
Simply push the roll into the holder until it’s snugly in place against the retaining lip. The entire design is based on creating a firm grip of the roll without causing damage
The PVC pipes and fittings create a robust and functional structure that is able to handle the weight of the thermal paper roll.
Conclusion
This DIY PVC thermal label roll holder is a cost-effective and surprisingly simple project. The instructions are easy to follow, making it suitable for beginners with some basic DIY experience.
The sturdy PVC construction ensures durability, suitable for regular use in various settings. The simple design makes it easy to use and maintain.
Overall, this project offers a functional solution for organizing thermal rolls while also providing a satisfying DIY experience.