Shipping packages efficiently and professionally is crucial for any business, and clear, well-designed labels are the cornerstone of a smooth delivery process. Avery labels, known for their quality and reliability, offer a convenient solution, especially when combined with their user-friendly online design and print software. This powerful tool allows you to create customized shipping labels tailored precisely to your needs, eliminating the hassle of manual label creation and ensuring accurate information every time. No more messy handwriting or misaligned text!
This guide provides a comprehensive step-by-step walkthrough of how to effortlessly design and print professional Avery shipping labels using Avery Design & Print Online. We'll cover everything from selecting the right template and inputting your shipping details to properly configuring your printer and printing your labels, guaranteeing a flawless shipping experience from start to finish. Let's dive into the process!
Preparation and Safety Guidelines
- Computer
- Tablet
- Phone
- Avery 8126 inkjet labels
- Inkjet Printer
- Always double-check your address information before printing. Incorrect addresses can cause significant delays or prevent delivery.
- Use high-quality printer ink and paper for optimal results. Faded or blurry labels may not be scannable.
- Before printing a large quantity, test print a single label to ensure the design and alignment are correct on your chosen Avery product. This prevents wasting labels and ink.
Step-by-Step Instructions
Find the Template
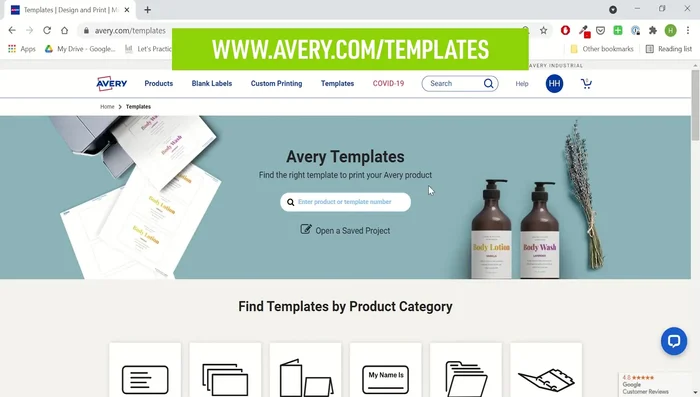
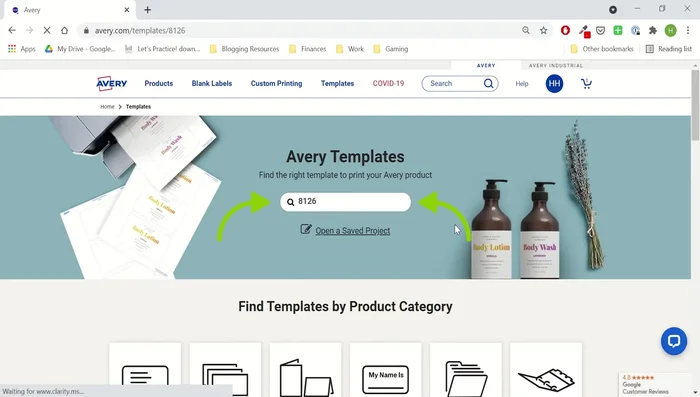
- Go to avery.com/templates or click the 'templates' tab on avery.com
- Type in the Avery product number (e.g., 8126 for inkjet printers) to find the correct template.

Find the Template Start Design & Account
- Click the 'Start Designing' button. Sign in or create a free Avery account to save your projects.
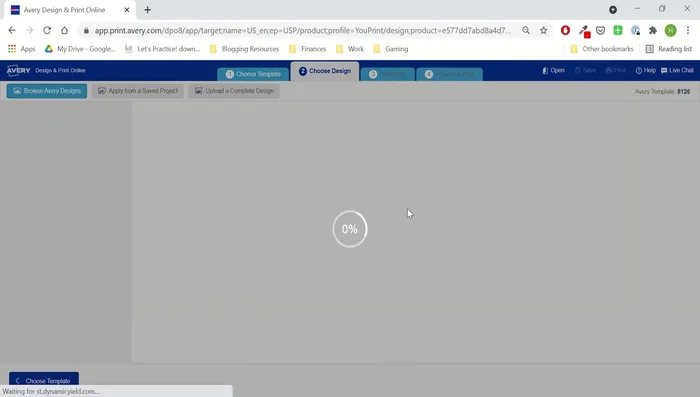
Start Design & Account Select Template
- Choose a blank or pre-designed template. Select 'blank template' in wide format.
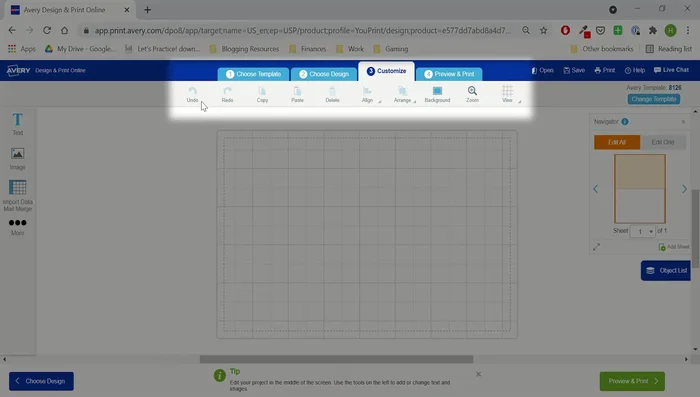
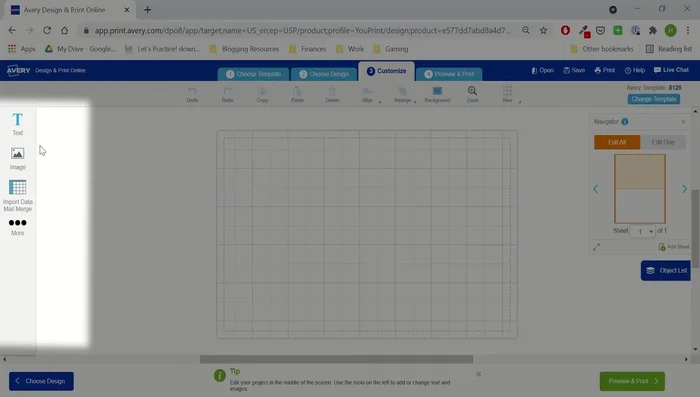
Select Template Design the Master Label
- Customize your labels using the editing tools (undo, redo, copy, paste, delete). Use the 'navigator' to edit one or all labels (recommended to stay on 'edit all' until final design).
- Add text boxes for return address and recipient addresses. Adjust font styles and sizes using the text menu.
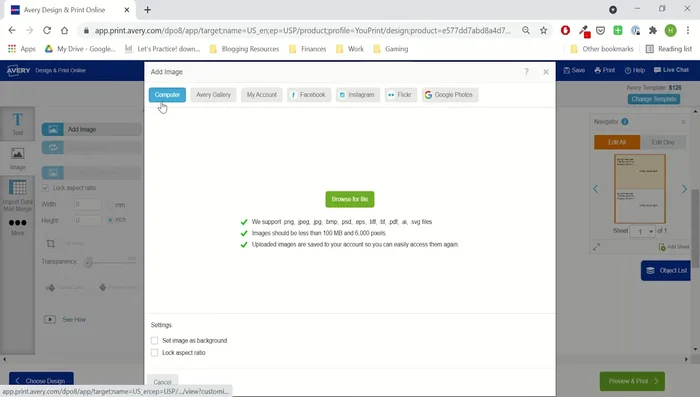
- Add images from the Avery gallery or your computer using the 'images' menu.
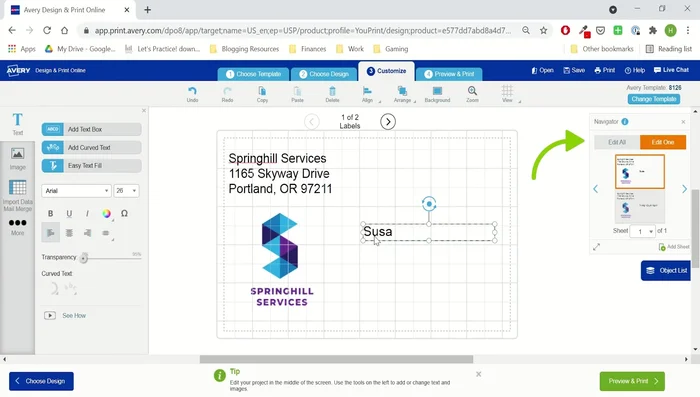
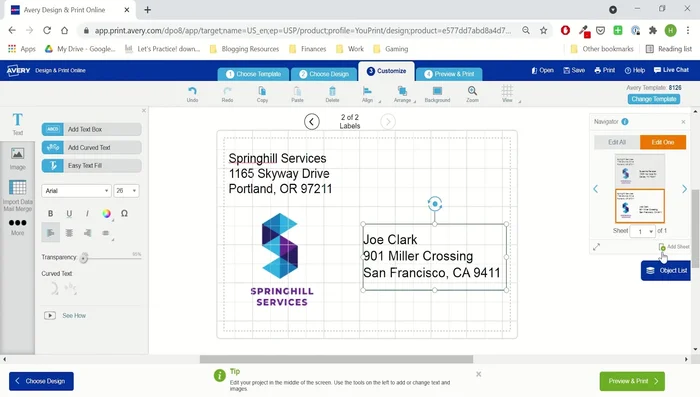
Design the Master Label Customize Individual Labels
- Switch to 'edit one' in the navigator to make individual changes to each label. Add addresses to the placeholders.
Customize Individual Labels Add More Labels (if needed)
- Add more sheets as needed by clicking near the bottom of the navigator.
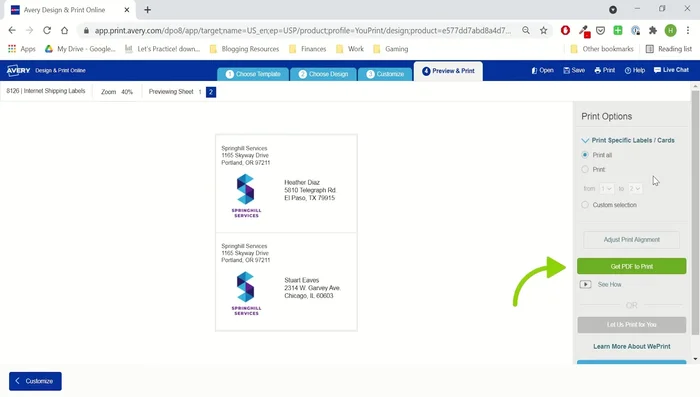
Add More Labels (if needed) Preview and Print
- Click 'preview and print' to see the full page view, then click 'print it yourself and get pdf to print'. Save your project if desired.
Preview and Print

Read more: Creating FedEx Shipping Labels: A Step-by-Step Guide Using FedEx Ship Manager
Tips
- Use the correct label type for your printer (e.g., Avery 8126 for inkjet).
- Check the product number and printer compatibility on the package.
- Watch the mail merge video for detailed instructions on importing data from spreadsheets.
- Watch the shipping labels printing tips video for more help.
- Visit avery.com/help for more information or to contact customer support.