Shipping packages efficiently and reliably is crucial for businesses of all sizes, and FedEx offers a robust system to manage this process: FedEx Ship Manager. This powerful tool simplifies the often-daunting task of creating shipping labels, allowing you to streamline your workflow and ensure your packages arrive on time and in perfect condition. Knowing how to navigate the software is key to maximizing its efficiency and saving valuable time and resources.
FedEx Ship Manager provides a user-friendly interface for generating shipping labels, tracking shipments, and managing all aspects of your shipping needs. This guide will walk you through a detailed, step-by-step process of creating FedEx shipping labels using FedEx Ship Manager, eliminating any confusion and empowering you to become proficient in this essential business function. Let's dive into the step-by-step instructions.
Preparation and Safety Guidelines
- Computer
- Internet Access
- Always double-check the recipient's address for accuracy before generating the label. Incorrect addresses lead to delays and potential lost packages.
- Ensure your package weight and dimensions are accurately entered. Incorrect information can result in incorrect shipping charges and delivery issues.
- Print your label clearly on a high-quality printer using the correct settings. A blurry or damaged label can prevent your package from being scanned and processed.
Step-by-Step Instructions
Login and Access Ship Manager
- Visit fedex.com and log in with your FedEx.com user ID. Then click 'Ship FedEx Ship Manager'.
- Choose the 'Compact View' layout for a streamlined process.

Login and Access Ship Manager Enter Sender Information
- Enter sender information. Click the 'Ship From' module to expand, and check the box to 'Save as default shipper address' if desired.
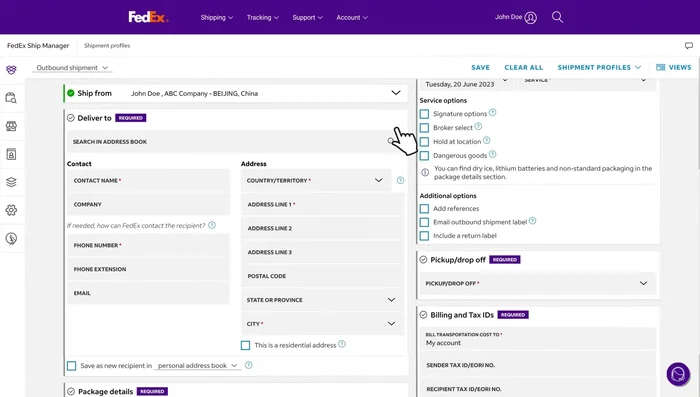
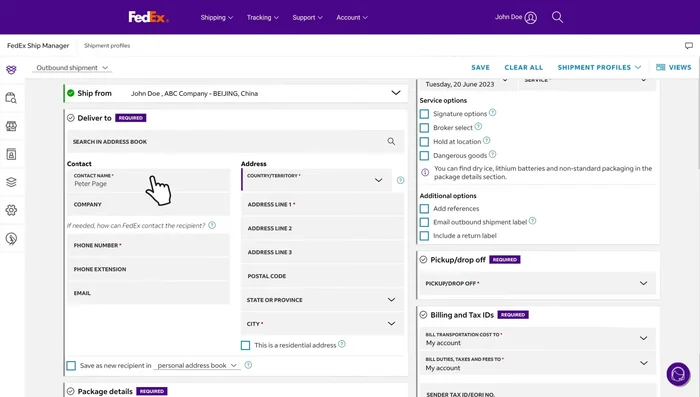
Enter Sender Information Enter Recipient Information
- Enter recipient's shipping information. Check 'Save as a new recipient' to save for future use.
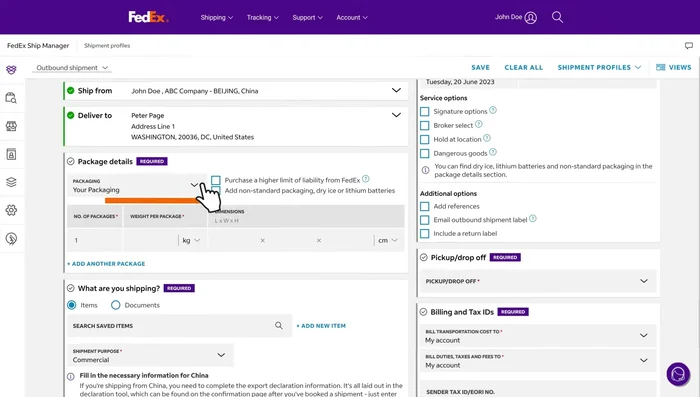
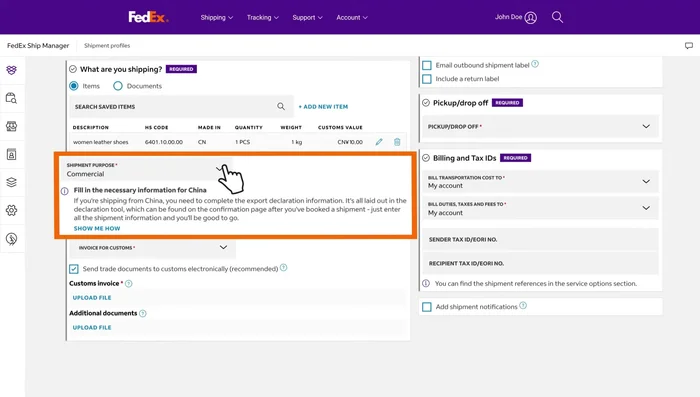
Enter Recipient Information Specify Package and Item Details
- weight, dimensions, packaging type (FedEx packaging or your own), and contents (documents or items). For items, provide details including materials, usage, and customs declaration value if necessary. Use the harmonized code field for smooth customs clearance.
Specify Package and Item Details Handle Commercial Invoice
- For commercial shipments, ensure you have a commercial invoice. FedEx Ship Manager will guide you through this process, and you can optionally create one online or upload an existing one.
Handle Commercial Invoice Select Shipping Options
- Select shipment date (up to 10 business days out), shipping service, and tendering method (e.g., schedule a pickup).
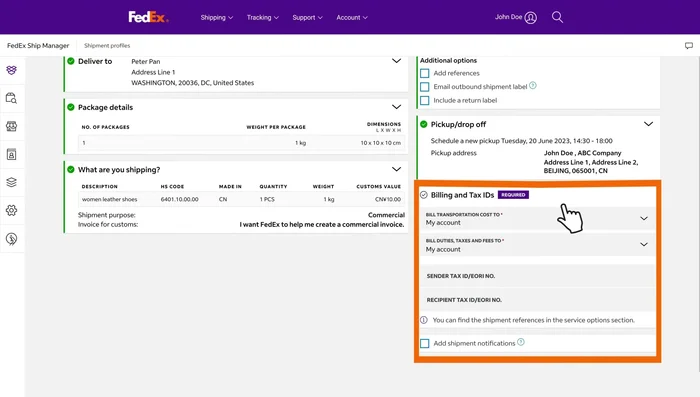
Select Shipping Options Select Billing and Tax Information
- Select billing party (sender, recipient, or third party). If shipping to the EU, enter your EORI number in the tax ID field.
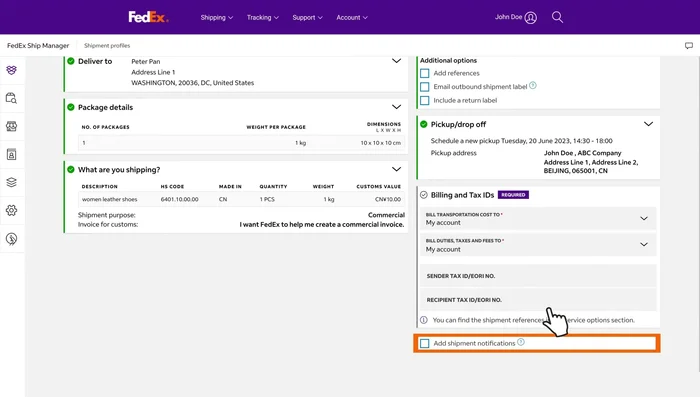
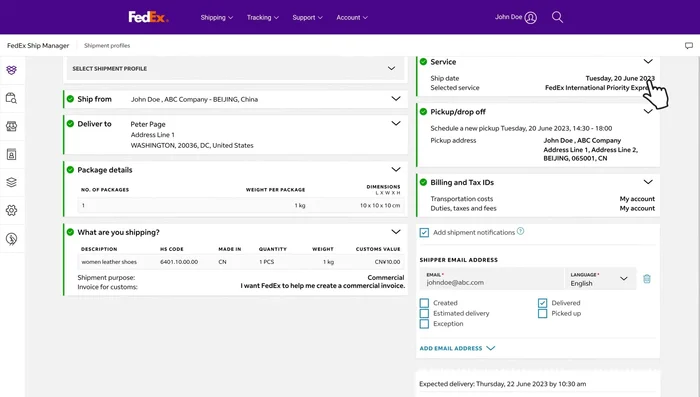
Select Billing and Tax Information Set Up Notifications
- Add shipment notifications (email addresses, preferred languages).
Set Up Notifications Review and Finalize Shipment
- Review all information, check fees and estimated delivery time. Click 'Finalize'.
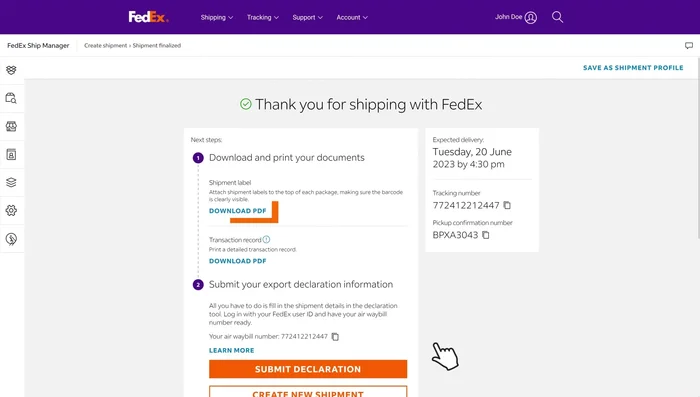
Review and Finalize Shipment Download Label and Save Profile
- Download and print your shipping label from the 'thank you' page. Save a shipment profile for future similar shipments.
Download Label and Save Profile


Read more: How to Design and Print Avery Shipping Labels Using Avery Design & Print Online
Tips
- All information must be entered in English.
- Utilize the 'Save' feature to save drafts and retrieve them later.
- Use 'Save as new item' and 'Save as new recipient' to easily reuse information for future shipments.
- Use the 'add package options' for shipments containing dry ice, non-standard packing, or lithium batteries.
- Take advantage of FedEx's electronic trade documents service to avoid customs delays.