The BradyPrinter i5100 is a workhorse for labeling professionals, delivering consistent, high-quality prints day after day. But to maintain its peak performance and longevity, regular cleaning is essential. Dust, debris, and residual adhesive can accumulate, impacting print quality and potentially leading to costly repairs or premature failure. Ignoring this crucial maintenance step can result in blurry labels, inconsistent printing, and ultimately, wasted time and resources. A clean printer translates directly to efficient workflow and accurate labeling.
This ultimate guide provides a comprehensive, step-by-step process for thoroughly cleaning your BradyPrinter i5100, ensuring it continues to deliver crisp, clear labels for years to come. We'll walk you through cleaning the printhead, removing debris from critical areas, and maintaining the overall hygiene of your printer, so let's get started with the detailed cleaning instructions below.
Preparation and Safety Guidelines
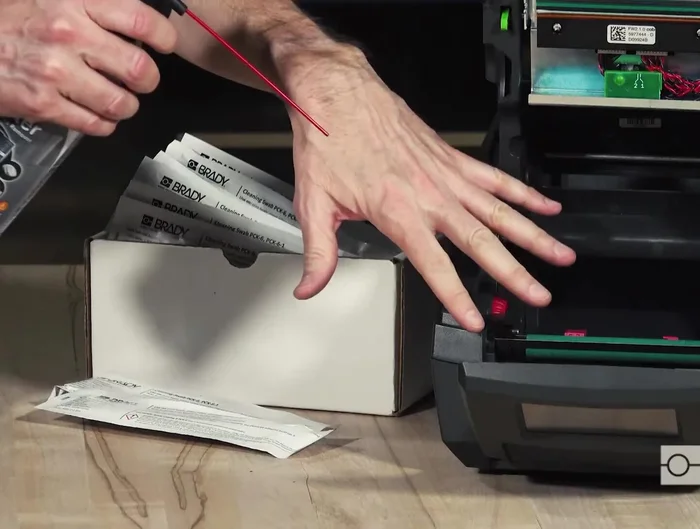
- Pure Isopropyl Alcohol (IPA)
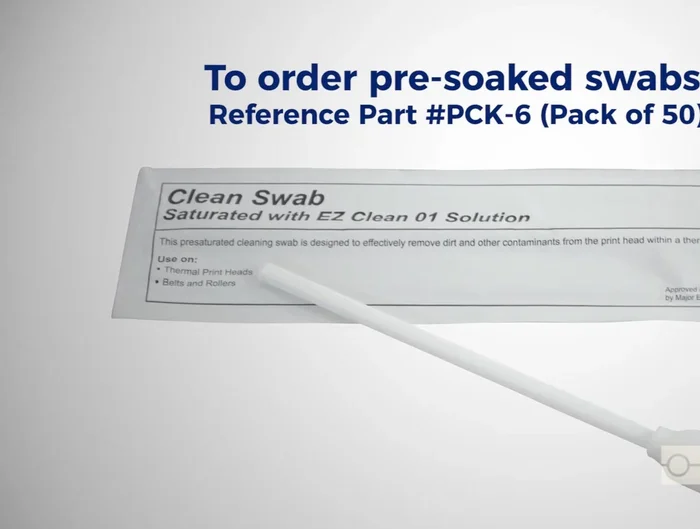
- Cleaning Swabs (Brady PC k-6 recommended)
- Canned Air
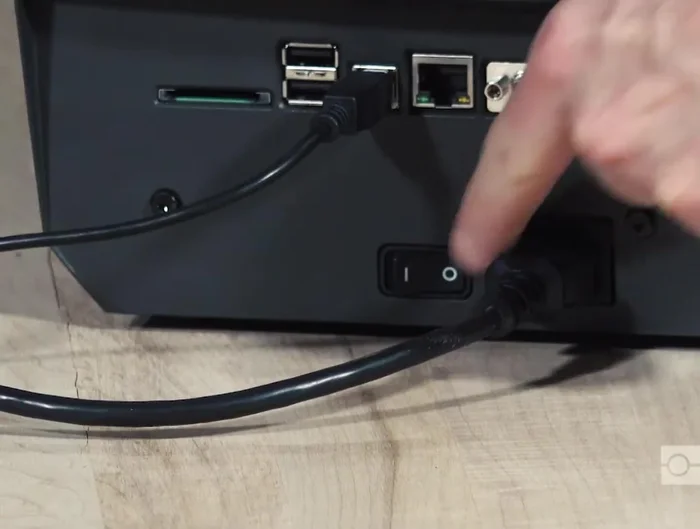
- Always unplug the Brady printer from the power source before cleaning or performing any maintenance.
- Never use abrasive cleaners or solvents on the printhead or other sensitive components. Use only the recommended cleaning supplies from Brady.
- Avoid touching the printhead directly with your fingers. Oil and dirt from your hands can negatively impact print quality.
Step-by-Step Instructions
Power Down and Prepare
- Turn off the printer and ensure the blue light is off.
- Remove the label roll and ribbon from the printer.

Power Down and Prepare Initial Air Cleaning
- Use short bursts of canned air to clean the print roller area, sensor area below the print roller, and the area above and behind the printhead assembly.
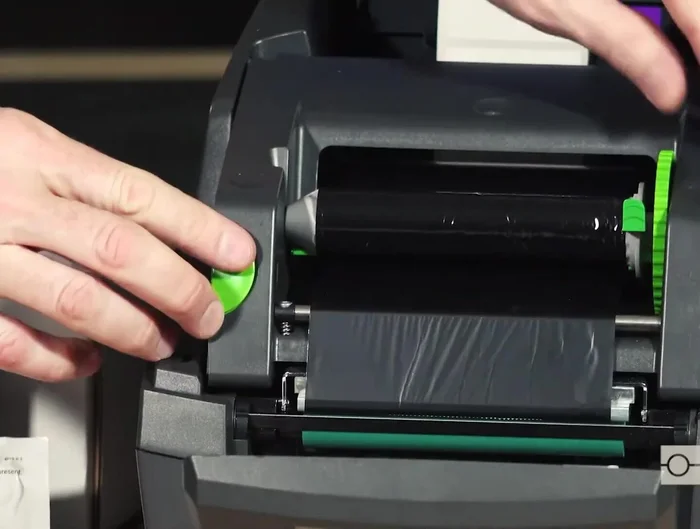
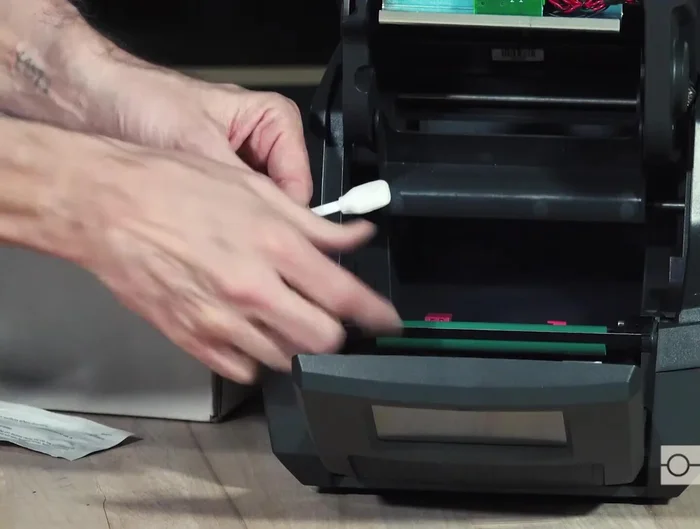
Initial Air Cleaning Printhead Cleaning
- Use a cleaning swab (Brady PC k-6 recommended) to clean the printhead assembly, starting with the leading edge of the silver bar, then the green and glass surface. Remove any ink or adhesive residue.
Printhead Cleaning Print Roller Cleaning
- Clean the print roller using even pressure, manually advancing it with your thumb and forefinger until all surfaces are clean. Ensure the reflex sensor window is clear.
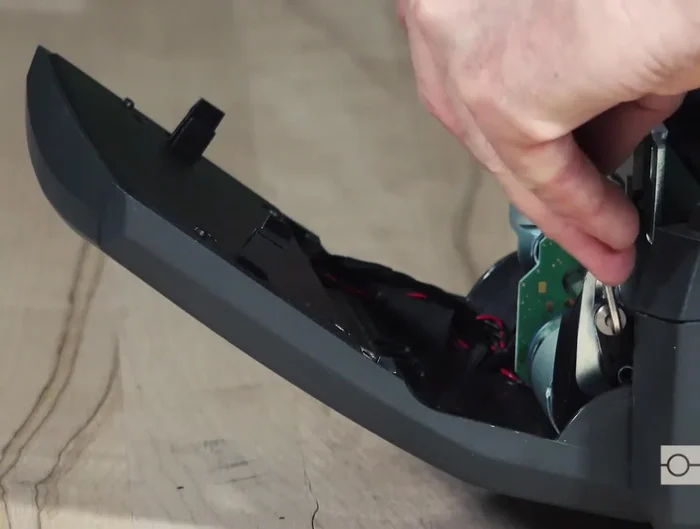
Print Roller Cleaning Exit Chute Cleaning
- Clean the exit chute/slot in the front control panel, including the flat black plastic part inside, removing any adhesive buildup.
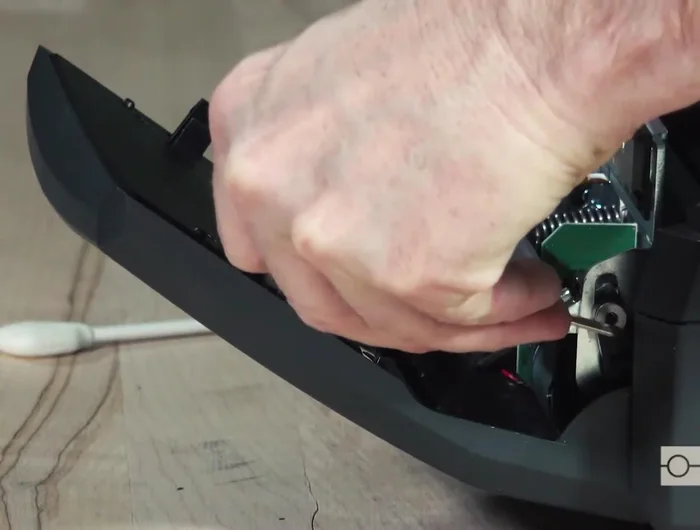
Exit Chute Cleaning Auto-Cutter Cleaning (If Applicable)
- If you have the auto-cutter version, lower the front control panel, locate the black tabs, press them in to release the cutter, and swing it upward.
- Using a 2.5mm Allen key, rotate the blade down (carefully!). Clean the top, front, and underside of the blade with a cleaning swab from various angles.
- Swing the blade back up and snap the tabs into place. Clean any debris in the cutter's exit chute.
Auto-Cutter Cleaning (If Applicable) Final Steps
- Reload the printer and allow 2-3 minutes for the isopropyl alcohol to dry before printing.

Read more: Quick Setup Guide: Beeper by 426 Thermal Label Printer (Windows & Mac)
Tips
- Clean your print head and rollers after every roll of label material.
- Use short pulses of canned air.
- Be very careful when handling the exposed blade in the auto-cutter module.