Selling goods online requires efficient shipping, and a crucial part of that process is creating and printing accurate shipping labels. PayPal, beyond its established role in online payments, offers a convenient integrated solution for streamlining this aspect of e-commerce. This feature saves you the hassle of navigating separate shipping platforms and ensures your labels are correctly formatted for your chosen carrier, ultimately improving your shipping efficiency and customer experience. No more juggling multiple websites or dealing with complicated label generation software!
This comprehensive guide provides a clear and concise step-by-step process to effortlessly create and print professional shipping labels directly through your PayPal account. Let's dive into the simple steps that will transform your shipping workflow, saving you time and money while enhancing your business's overall professionalism. Follow along as we walk you through each stage, from selecting your shipment details to successfully printing your label ready for dispatch.
Preparation and Safety Guidelines
- Always double-check the recipient's address before printing the label. Incorrect addresses can lead to delays or lost packages.
- Ensure your printer is properly set up and has enough ink or toner before printing. Faulty labels may not be scanned correctly by shipping carriers.
- Keep a copy of your shipping label for your records. This is crucial for tracking purposes and resolving potential issues with your shipment.
Step-by-Step Instructions
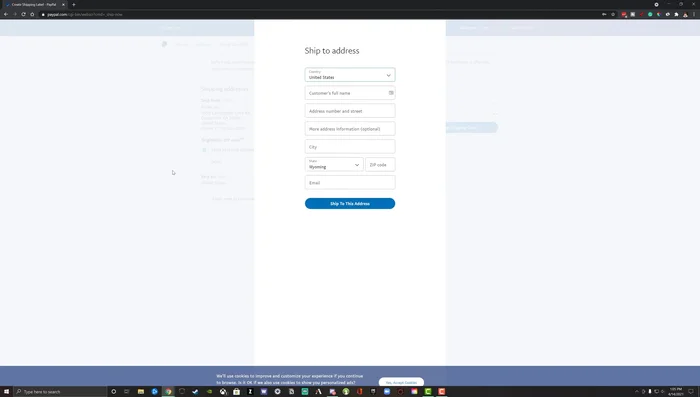
Access PayPal Shipping
- Open your web browser and go to www.paypal.com/shipnow
- Log in to your PayPal account.

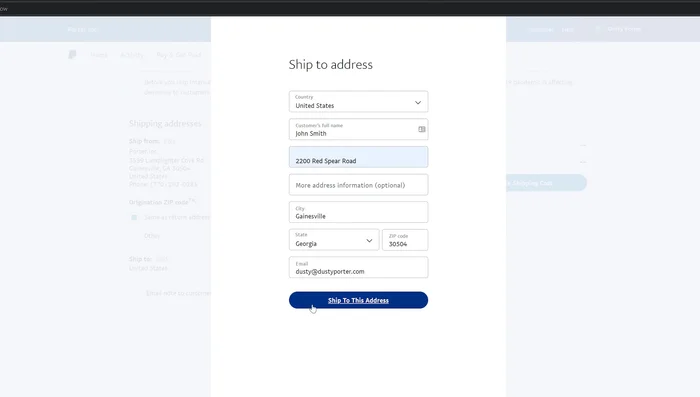
Access PayPal Shipping Enter Recipient's Address
- Enter the shipping address (recipient's address).
- Click 'Ship to this address'.
Enter Recipient's Address Verify Addresses
- Verify your shipping and return addresses.
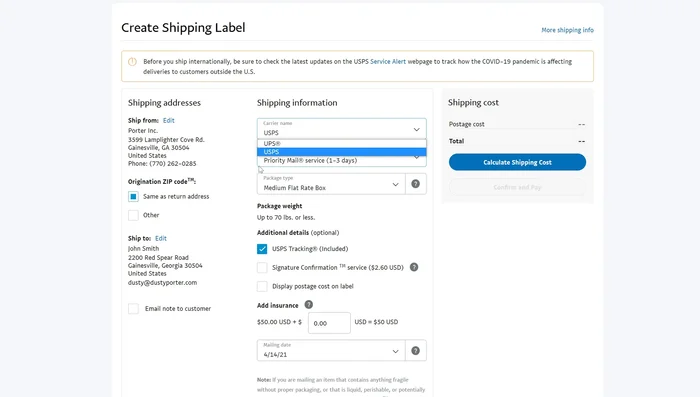
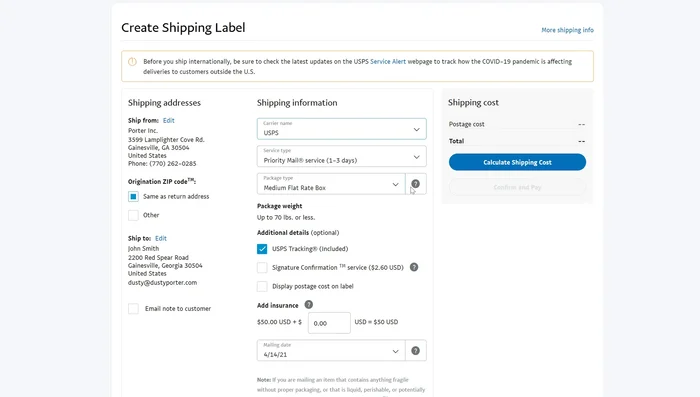
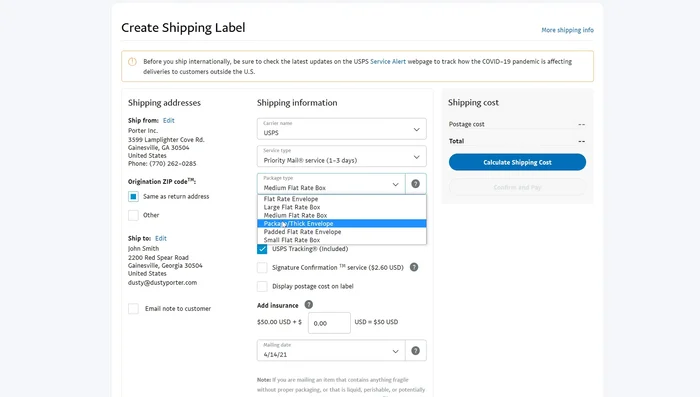
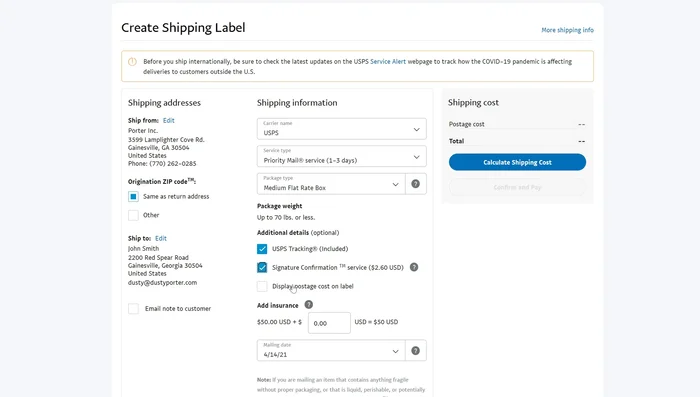
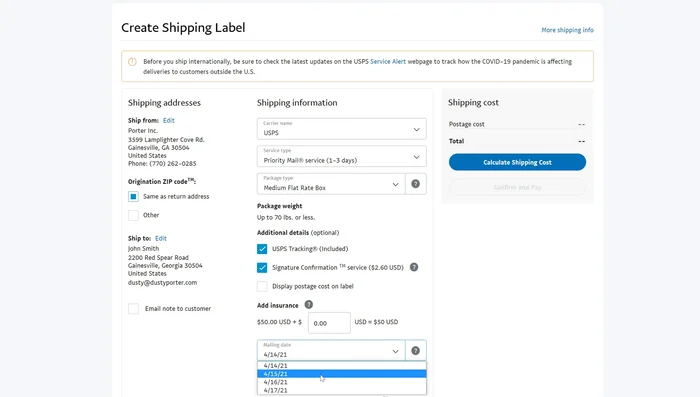
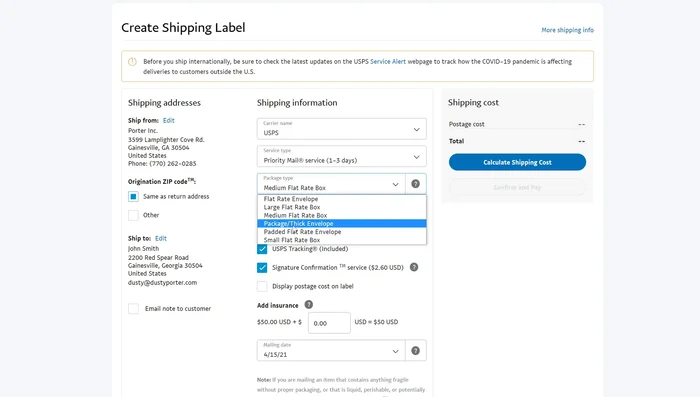
Verify Addresses Select Shipping Options
- Select the carrier (e.g., USPS, UPS).
- Choose the service type (e.g., Priority Mail).
- Select the package size and accurately weigh your package.
- tracking, signature confirmation, display postage cost on label, insurance.
Select Shipping Options - Select the mailing date.
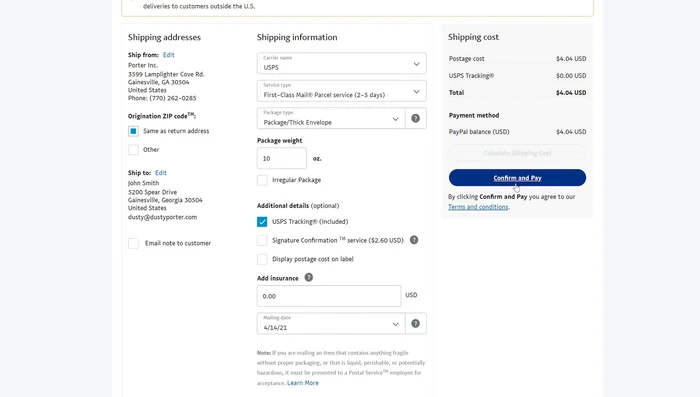
Select Shipping Options Calculate and Pay for Shipping
- Click 'Calculate Shipping Cost'.
- Click 'Confirm and Pay Now'.
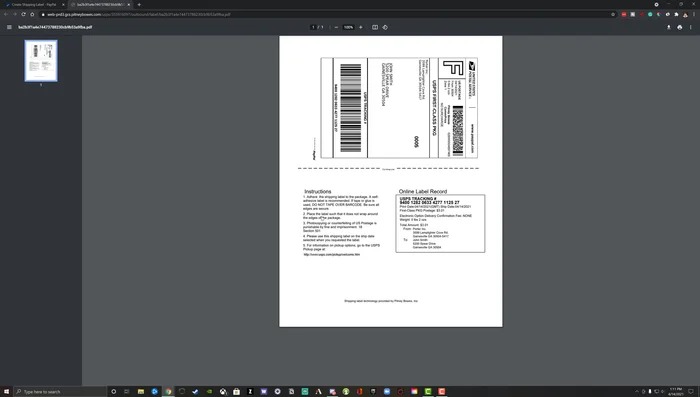
Calculate and Pay for Shipping Print Shipping Label
- Print the shipping label. Ensure the barcode is not covered.
Print Shipping Label


Read more: Creating FedEx Shipping Labels: A Step-by-Step Guide Using FedEx Ship Manager
Tips
- Accurately weigh your package to avoid incorrect label purchases and returns.
- Consider adding insurance for valuable items.
- Use the 'Void' option to cancel a label if needed.